Replacing a Toyota Yaris Mirror can look like a small repair, but the job varies by model year and mirror type. Some mirrors adjust by hand. Others include power controls, heating, or turn signals. Those features affect the wiring and parts you need. Check your owner’s manual and confirm the replacement matches your Yaris before removing anything. A mirror that fits the door but has the wrong connector can waste time and leave useful features disconnected.
Work slowly. You’ll typically need basic hand tools, a safe place to set the door trim, and care around plastic clips. The exact removal process differs between generations, so a model-specific service guide is more reliable than a one-size-fits-all video. Keep each screw and clip together. Small parts disappear easily. Before beginning, inspect the damaged mirror and surrounding door for broken mounts or wiring. If the door panel resists, stop and look for a hidden fastener rather than forcing it. That is an easy mistake to make. This guide will explain how to prepare, remove the old assembly, connect the replacement, and test its movement and electrical functions. If wiring is damaged or the mounting area is bent, professional help may be the safer choice. A careful repair should restore a clear view, not just make the car look complete.
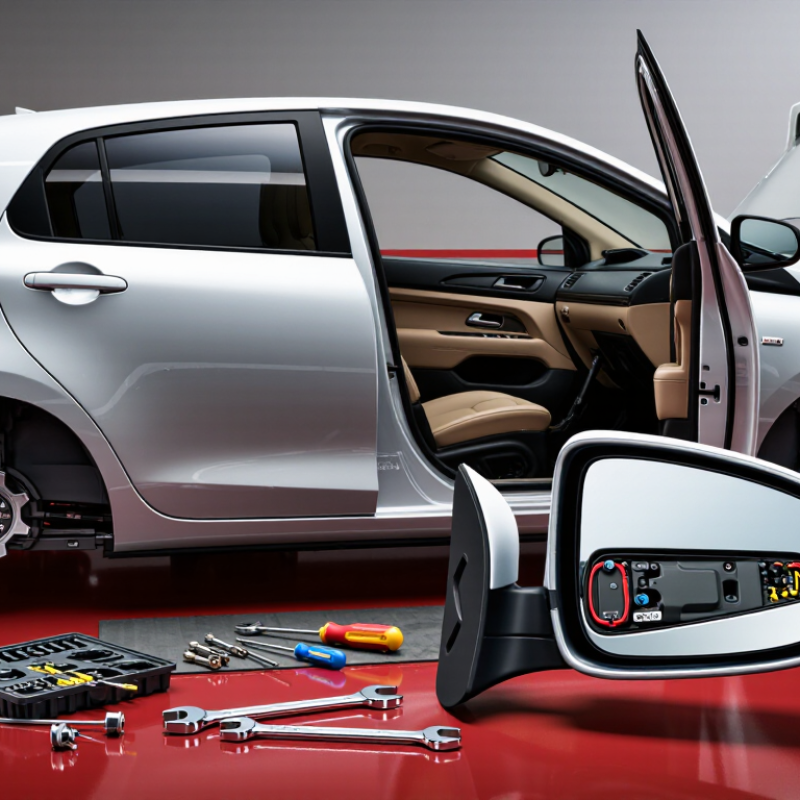
Before buying a replacement, identify exactly which mirror component is damaged. The vehicle may need only a glass insert, or the complete housing and mounting base. Check whether the mirror adjusts electrically, folds, or contains a heater or turn signal. Compare the connector, mounting points, and shape with the part on the vehicle. A small mismatch can prevent installation.
Check the vehicle’s year and body style, then confirm the part details in its owner’s manual or a reliable parts reference. This step is easy to rush. Take your time. Gather a trim-removal tool, a correctly sized socket set, a Phillips screwdriver, and gloves. A plastic trim tool helps release door-panel clips with less risk of scratching the finish. Keep a small container nearby for screws and clips. If the mirror has electrical connectors, use a flashlight to see the locking tabs clearly. Don’t pull on the wires. The exact fasteners can vary, so inspect the panel before choosing a tool rather than forcing it. A service guide for the specific model year can clarify unfamiliar clips and connector locations.
Gather one of each basic tool shown. The exact socket size and any electrical tools depend on the vehicle’s mirror type and fasteners; check the service information before starting.
Park on level ground, set the parking brake, and switch off the ignition. Remove loose items from the front seat so tools stay within reach. Check that the replacement mirror matches the vehicle’s connector and mounting points before taking anything apart. A small mismatch can turn a quick repair into a frustrating one.
Protect the painted door with a clean cloth or masking tape. Gather a trim tool, the correct socket, and a container for screws. If the mirror has electrical adjustment, heating, or a signal light, consult the vehicle’s service information before disconnecting wiring. Some procedures require the battery’s negative cable to be removed; others do not. When instructed, disconnect it with the ignition off and keep the cable clear of the terminal. Wait the specified time before working near wiring, and remember that settings may need to be restored afterward.
Keep the window partly open if it gives you a better view of the door panel. Take a photo of each connector and fastener as you uncover them. That little record helps during reassembly. Work gently around plastic clips; they can become brittle, and forcing one may crack the panel. If the service instructions are unclear, pause rather than guessing. I’d rather spend a minute checking than replace a broken clip later.
Park on level ground, switch off the ignition, and check the vehicle’s service instructions before removing the door trim. Door layouts vary, especially around switches and side-impact safety equipment. Keep the window raised. Remove the handle bezel and switch panel carefully, then look for screws hidden beneath small covers. Use a plastic trim tool to release the panel clips; a sharp tug can crack old plastic. A stubborn clip can still surprise you, so pause and check for another fastener rather than forcing the panel.
Lift the trim panel upward and away from the door. Disconnect electrical plugs by their tabs, not by pulling the wires, and release the handle cable if fitted. Fold back the moisture barrier gently; it needs to seal properly when reinstalled. Support the mirror from outside while unplugging its connector and removing the mounting nuts. Feed the wiring through the opening, then lift the mirror clear. Keep the nuts together in a small tray. It is easy to overlook one.
Tips: Wear eye protection, and take a photo of each connector before unplugging it. If the trim resists, stop and inspect the edge for a concealed screw or clip. Refit the moisture barrier carefully to help prevent water leaks.
A general guide for a door-mounted power mirror. Trim fasteners, wiring connections, and removal details vary by vehicle; consult the vehicle service information before starting.
| Step | Task | What to Do | Typical Time | Check Before Moving On |
|---|---|---|---|---|
| 1 | Prepare the vehicle | Park on a level surface, switch off the ignition, remove the key, and protect the painted door area with a clean cloth. If the work involves wiring near an airbag, follow the vehicle’s battery-disconnection procedure and specified waiting period. | 5–10 min | Confirm the vehicle is secure and any required electrical precautions have been followed. |
| 2 | Gather tools | Use a plastic trim-removal tool, the correctly sized screwdriver or socket, a small container for fasteners, and a soft cloth. A flashlight can help locate concealed screws and connectors. | 5 min | Use tools that fit the fasteners to reduce the risk of damage. |
| 3 | Remove the door trim | Locate and remove visible screws, including any hidden behind covers or inside the door pull. Starting at the lower edge, release the trim clips with a plastic tool and work around the panel. Lift the panel as directed by its design, then support it without pulling on the wiring. | 15–30 min | Keep screws together and inspect the panel edge for clips left in the door. |
| 4 | Access the mirror wiring | Disconnect switch or speaker connectors that prevent the panel from being moved safely. Peel back only the necessary portion of the moisture barrier, taking care not to tear it. | 5–10 min | Do not let the door trim hang by its wires; keep the moisture barrier intact for reinstallation. |
| 5 | Disconnect the existing mirror | Locate the mirror electrical connector and release its locking tab before separating the plug. If fitted, remove the interior trim cover at the mirror mounting point. | 5 min | Pull on the connector body, not on the wires. |
| 6 | Detach the mirror | Support the mirror from outside the door. Remove its retaining nuts or fasteners from inside the door, keeping the mirror steady so it cannot fall or scratch the paint. Guide the wiring through the opening as the mirror is removed. | 10–15 min | Store the fasteners safely and check that no wiring or seal remains caught in the opening. |
| 7 | Fit the replacement mirror | Feed the connector through the opening and seat the mirror evenly against the door. Install the retaining fasteners by hand first, then tighten them evenly to the vehicle manufacturer’s specified torque. Reconnect the electrical plug. | 10–15 min | Use the specified torque rather than guessing; confirm the mirror base sits flat and the wiring is not pinched. |
| 8 | Test and reassemble | Before refitting the door trim, reconnect the battery if it was disconnected and test available mirror adjustment, folding, heating, or indicator functions. Refit the moisture barrier, reconnect all door-panel plugs, align the trim clips, and reinstall the screws and covers. | 15–25 min | Check that every clip is seated, the trim is flush, and all mirror functions operate correctly. |
Important: This is a general procedure, not a vehicle-specific repair specification. Fastener locations, airbag precautions, wiring, and tightening values vary; use the service information for the vehicle being repaired.
With the door trim removed, compare the replacement mirror’s connector and mounting points with the original. The parts should match before installation. If the mirror has wiring, connect the plug firmly and route the cable through its original opening. Keep it clear of window tracks and moving parts. Seat the mirror against the door without pinching the weather seal, then start each mounting nut by hand. Tighten them evenly to the vehicle’s service specifications; overtightening can crack plastic or distort the door panel.
Tips: Wear gloves. Support the mirror from outside while fastening it. A second person can help, but a folded towel also protects the paint if the mirror slips. Check the connector latch before closing the trim.
Before refitting the panel, turn on the ignition and test mirror adjustment, folding, and heating if equipped. Listen for unusual clicking. Then secure the trim clips and confirm every edge sits flush, especially near the window switch. I sometimes find one clip remains loose until I press directly above it; forcing the panel is a poor fix. Recheck the mirror from outside: it should feel stable, sit evenly against the door, and offer a clear view. If it vibrates or leaves a gap, stop and inspect the fit rather than tightening harder.
With the mirror secured, reconnect its wiring plug and tuck the harness clear of sharp edges and moving window parts. Align the door trim panel with its openings, then press around the edges until each clip seats. Refit the screws, switch panel, and handle trim without forcing them. A stubborn gap may mean a clip is misaligned, not that the panel needs more pressure. Check the service manual for your exact trim layout.
Before driving, turn the ignition on and test every available mirror function: adjustment, folding, heating, and indicator lights. Move the glass through its full range and confirm the view stays steady. Open and close the window, then shut the door and listen for a new rattle. IIHS and HLDI reported in a 2017 analysis that blind-spot monitoring was associated with 14% fewer lane-change crashes. That finding concerns driver-assistance technology, not mirror repairs, but it underscores why a clear side view matters.
Tips: Keep the fasteners grouped by location. A phone photo before reassembly can help, though it is easy to miss a hidden clip. Wipe fingerprints from the glass and check the view from your normal driving position.